Mastering the Use of Glazes for Depth and Dimension
Table Of Contents
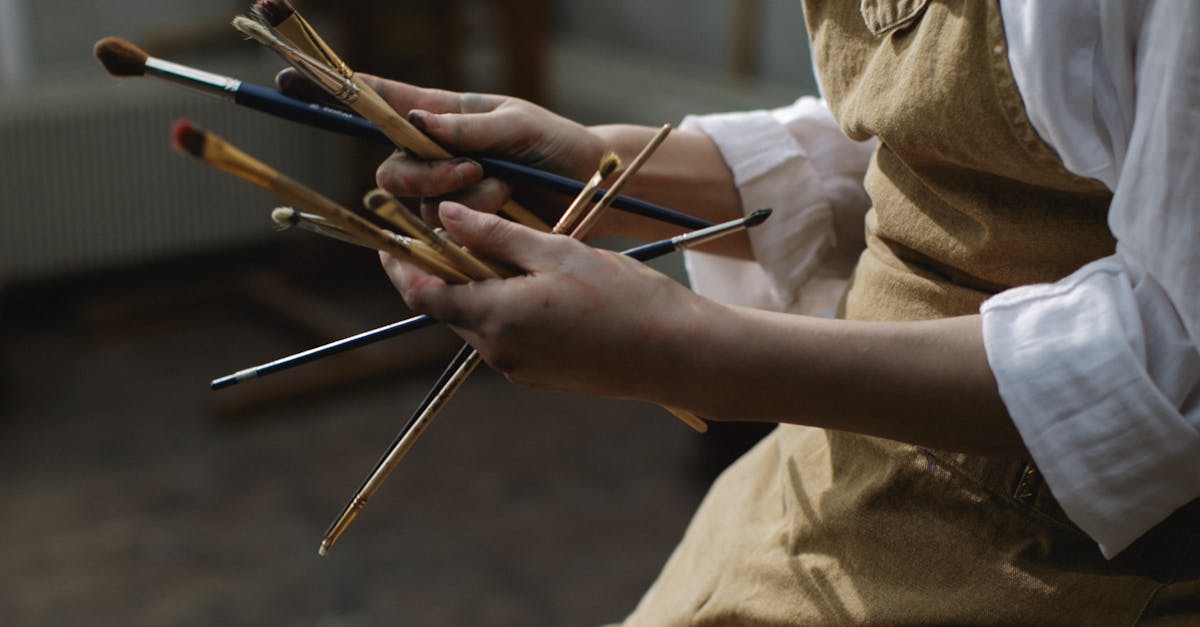
Tools and Materials for Glazing
Selecting the right tools and materials is essential for achieving the desired effects in glazing. High-quality brushes are pivotal, with options ranging from soft squirrel hair for smooth application to stiffer bristle brushes for bolder strokes. Additionally, using a variety of palettes can help in mixing glazes efficiently, while containers for storage ensure that mixtures remain usable over time. Don't overlook the importance of sponges or rags, as they can be invaluable for removing excess glaze or creating textured finishes.
The choice of glazes themselves makes a significant impact on the final piece. Artisans often prefer commercial glazes due to their consistent results, while others might opt for homemade recipes for more unique effects. Experimenting with different bases can yield exciting colour variations and surface textures. Remember that the thickness of the glaze will influence the outcome; thin layers produce translucency, whereas thick applications can add substantial depth. The interplay of these materials ultimately contributes to the rich visual narratives in your artwork.
Must-Have Items for Every Artist
A solid selection of tools and materials forms the foundation for successful glazing. Quality brushes, including a variety of sizes and shapes, enable precision and versatility in application. Consider using synthetic brushes, as they provide excellent control and durability when working with both thick and thin glazes. Additionally, a palette for mixing colours allows for the creation of unique shades, making it easier to achieve desired effects. Having a range of glazes on hand is essential for experimentation; they come in matte, glossy, transparent, and opaque finishes, each offering different visual characteristics.
Incorporating other materials such as sponge applicators and spray bottles can enhance techniques and textures. Sponges introduce soft transitions and blended effects, while spray bottles allow for misting and layering glazes. A good set of sponge brushes can aid in achieving both precise lines and broader strokes, perfect for various artistic visions. Protective gear, such as gloves and masks, is also vital when handling certain glazes and materials, ensuring safety during the creative process. This assortment of essential tools directly contributes to the depth and dimension achieved in your artwork.
Common Mistakes When Using Glazes
One frequent error artists make is applying glazes too thickly. This can result in a pooled effect that alters the intended colour and texture of the surface. A heavy application may also inhibit the glaze from properly interacting with underlying layers. A more controlled approach, characterised by thin layers, allows for greater transparency and depth, facilitating a more harmonious blend with the underlying paint.
Another common mistake involves neglecting to test glazes on separate swatches before applying them to the main piece. Each glaze reacts differently to various surfaces and can produce unexpected results, potentially leading to a disappointing outcome. Conducting tests helps artists anticipate how the glaze will look once applied, ensuring the final work aligns closely with the original vision. Emphasising preparation can significantly enhance the glazing process.
How to Avoid Pitfalls
Mistakes often occur when artists rush the glazing process. It is essential to allow sufficient drying time between layers to prevent unwanted mixing of colours. Applying a thick layer may seem appealing for depth but can lead to unsightly drips or runs. Experimenting with glaze thickness on test tiles can be beneficial. This practice helps in understanding how the glaze behaves at various consistencies and can inform future projects.
Another common issue arises from inadequate mixing of the glaze. Variations in colour intensity can result from not thoroughly blending the components. Stirring the glaze well before use ensures an even application and consistent results. Using different application tools can also minimise mishaps. Brushes, sponges, and sprayers each produce distinct effects, which can enhance the final piece while reducing the risk of over-application.
Experimenting with Glaze Application
Exploring various glaze application techniques can significantly enhance the visual impact of ceramic pieces. Artists can manipulate the thickness of glazes to create contrasting textures, leading to intriguing surface effects. Techniques such as pouring, spraying, and dipping offer different results that can be layered for added complexity. Each method brings its own characteristics, making it essential for artists to approach these techniques with a spirit of experimentation.
Incorporating unconventional tools can further open up creative avenues. Sponges, brushes, and even household items can produce unique patterns and effects on the surface of the work. Mixing glazes and adding materials like oxides or stains can yield unexpected results. By documenting the outcomes of these explorations, artists build a personal library of techniques to draw upon in future projects. This process not only fosters innovation but also strengthens an artist's relationship with their materials.
Creative Approaches to Glazing
Embracing unconventional techniques can lead to stunning results in your glazing projects. Consider layering multiple types of glazes to create a unique surface quality. Experimenting with various applications, such as pouring, spraying, or brushing, allows for an array of textures and finishes. Each method brings distinct characteristics that can transform a piece, enhancing its overall visual appeal.
Incorporating materials like sponge or cloth into your glazing process opens up further possibilities. These tools help achieve interesting patterns or effects that traditional brushes may not provide. Additionally, adjusting the viscosity of your glaze can reveal different outcomes, encouraging you to explore how thick or thin layers interact. The creative use of glazes goes beyond traditional methods, inviting artists to push boundaries and develop their individual style.
FAQS
What are the essential tools and materials needed for glazing?
Essential tools and materials for glazing include a variety of brushes, palette knives, sponges, and different types of glazes suited for your medium. Additionally, having a mixing palette and appropriate sealing materials can enhance your glazing experience.
What are some common mistakes artists make when applying glazes?
Common mistakes include applying glazes too thickly, not allowing proper drying time between layers, and failing to test glazes on sample pieces before applying them to final works. These errors can lead to uneven finishes and undesired colours.
How can I avoid common pitfalls when using glazes?
To avoid common pitfalls, always start with a clean surface, apply thin layers, and allow ample drying time. Testing your glazes on sample tiles can also help you understand how they will react with your chosen medium.
What are some creative approaches to glazing?
Creative approaches to glazing include layering different colours for depth, using unconventional application tools like rags or squeegees, and experimenting with various techniques such as splattering or pouring for unique effects.
Can glazing be used with all types of paint mediums?
While glazing is most commonly associated with oil and acrylic paints, it can also be adapted for watercolours and other mediums. However, it's important to ensure compatibility between the glaze and the underlying paint to achieve the desired results.
Related Links
The Latest Trends in Faux Finishes for Modern InteriorsTechniques for Creating a Metallic Finish in Home Decor
Integrating 3D Wall Panels with Faux Finishing Techniques
Crafting Realistic Stone Textures for a Nature-inspired Interior
Achieving the Look of Hand-painted Fabrics with Faux Techniques