Essential Tools for Perfecting Stencil Application
Table Of Contents
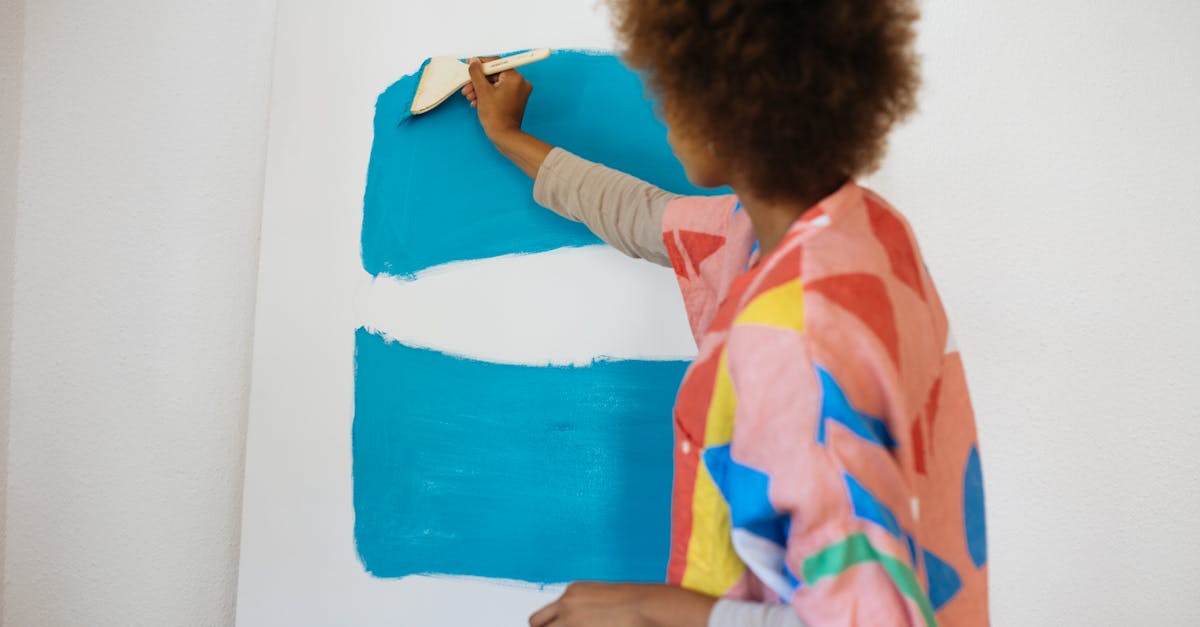
Applying Your Stencil
Choosing the right surface for stencil application is crucial for achieving the desired outcome. Ensure the area is clean and dry before starting. A smooth surface enhances the precision of the stencil design. If applying on textured materials, solid results may be harder to achieve. Temporary adhesives can help hold the stencil in place, preventing movement during application. Carefully position the stencil to avoid misalignment, as even small shifts can affect the final look.
Once the stencil is secured, it is essential to apply the paint or ink with care. Use a dabbing technique to minimise the risk of bleeding under the stencil edges. A stencil brush or sponge can provide better control than a traditional paintbrush. Monitor the amount of paint on your tool; too much paint can lead to smudging while too little may result in uneven coverage. Take your time to ensure every section is filled adequately, maintaining a consistent technique throughout the project.
Step-by-Step Guide to Accurate Application
Prepare your surface by ensuring it is clean and dry. Remove any dust or grease, as these can affect the adherence of your stencil. Position the stencil carefully on your desired area. Use a level or measuring tape to guarantee it is straight. Secure it in place with painter’s tape along the edges, preventing any movement during application.
Choose your paint carefully, considering colour and finish. Use a foam brush or a stippling brush for application. Dip the brush lightly in paint, remove excess to avoid dripping. Apply the paint with a dabbing motion, covering the stencil without pushing paint under the edges. Allow the paint to dry slightly before carefully lifting the stencil to avoid smudging.
Common Mistakes to Avoid
One frequent error is not securing the stencil properly before applying paint. Failing to hold it firmly can lead to smudges or uneven lines, compromising the design's precision. Using painter’s tape or weights to anchor the stencil in place ensures that it remains perfectly aligned during the application process. This small precaution can greatly enhance the overall quality of the finished project.
Another common mistake involves selecting the wrong type of paint or applicator. Some individuals may use a spray paint that is too thick for intricate designs, resulting in excess paint bleeding under the edges of the stencil. Alternatively, using a brush with bristles that are too stiff can cause similar issues. It’s best to opt for a fine-tipped brush or sponge with a consistency suitable for stencilling, allowing for a more controlled application that ultimately yields sharper lines.
Tips for Preventing Errors During Stencilling
Before starting your stencil project, it is crucial to ensure the surface is clean and ready for application. Any dust or debris can disrupt the process, causing the paint to bleed and creating an uneven finish. Take the time to wipe the area with a damp cloth and allow it to dry completely. This simple step can significantly enhance the quality of your work and contribute to a more polished result.
Another common challenge is misalignment. Carefully positioning the stencil can make all the difference in achieving a crisp image. Consider using low-tack painter’s tape to secure your stencil in place before applying paint. This will help prevent slippage and maintain the desired design. Additionally, using a light hand while applying paint can reduce the risk of excess seepage beneath the stencil edges, ensuring clean lines and a more precise finish.
Cleaning and Maintenance of Stencils
Proper cleaning of stencils after each use is crucial for maintaining their integrity and ensuring longevity. It is advisable to use a mild soap solution and soft cloth or sponge to gently scrub the stencil. Avoid abrasive materials, as they can scratch the surface and compromise the design. Rinse thoroughly under running water to remove any residue and ensure that the stencil is free from paint or ink remnants before storage.
Storing stencils correctly is equally important to prevent damage. Flat storage options or hanging them can help avoid creasing and bending. If the stencil material allows, consider placing a protective layer between stencils to prevent them from sticking together. Ensuring they are completely dry before storing is also essential to prevent mould or deterioration. Establishing a simple cleaning and storage routine can significantly extend the life of your stencils.
Keeping Your Stencils in Top Condition
Proper cleaning is vital for maintaining the longevity of your stencils. After each use, it is important to remove any paint residue promptly. Warm soapy water typically works well to eliminate stubborn paint, but for tougher materials, a soft brush can be employed to gently scrub the surfaces. Avoid using abrasive cleaners or scrubbing pads that might scratch or damage the stencil material.
Storage also plays a significant role in stencil preservation. It is advisable to keep stencils flat in a protective envelope or case, thus preventing bending or warping. If your stencils are made from materials sensitive to moisture, store them in a cool, dry place. Regular inspections for any signs of wear will help identify any necessary repairs before issues arise, ensuring your stencils remain in prime condition for future projects.
FAQS
What tools do I need for a successful stencil application?
Essential tools for stencil application include a good quality stencil brush or sponge, painter's tape, a craft knife or scissors for trimming, and a flat, clean surface for working.
How can I ensure my stencil is applied accurately?
To apply your stencil accurately, follow a step-by-step guide that includes cleaning the surface, securing the stencil with painter's tape, and using a stippling technique to apply paint evenly without overloading the brush or sponge.
What are some common mistakes to avoid when stencilling?
Common mistakes include not securing the stencil properly, using too much paint, and not allowing paint to dry between layers. It's also important to choose the right paint type for the surface you're working on.
How can I prevent errors during my stencilling project?
To prevent errors, make sure to practice on a scrap piece of material first, use a light touch when applying paint, and check for air bubbles or misalignment before starting your stencilling.
What is the best way to clean and maintain my stencils?
To clean and maintain your stencils, wash them gently with warm soapy water immediately after use, avoid using abrasive materials that could damage the stencil, and store them flat in a cool, dry place to prevent warping.
Related Links
Popular Themes for Stencilled Murals in Residential SettingsCombining Traditional Artistry with Modern Stencilling in Brisban
Expert Tips for DIY Stencilling in Your Home
Bringing Depth to Walls with Stencilled Effects
How to Choose the Right Stencils for Your Interior Project
Designing Custom Stencilled Patterns for Unique Interiors
The Art of Murals: Brisbane's Best Stencilling Practices